Need help navigating retrofits?
Register for free today!
The Benefits of Air Sealing
Reducing air leakage can be the most cost-effective energy-saving upgrade for your home; the leakier the home, the greater the savings. In addition to reducing heat loss and energy bills in the winter, air-sealing keeps your home cooler in the summer, improves comfort and indoor air quality. Air-sealing can also shrink the environmental footprint of your home by reducing your energy consumption and the greenhouse gas emissions produced by heating and cooling your home.
What is Air Leakage?
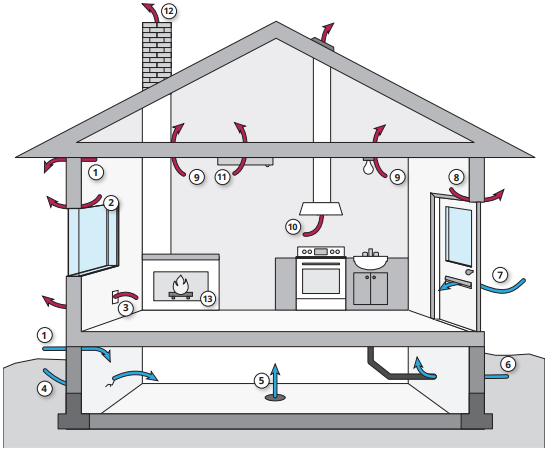
Air that moves though gaps, cracks or any hole in your home is air leakage. It is important to understand that air can leak into and out of your home. Gaps in the building envelope can occur in many places, from window frames to electrical sockets and behind kitchen appliances.
How to Identify Air Leakage
There are several options to identify air leakage in your home. For the first option, inspect your home’s interior and exterior to identify cracks, gaps, or openings. On a windy day or with your kitchen and bathroom exhaust fans on, you may be able to feel for the air leakage in these areas, particularly on colder days.
A second option is to hire an energy advisor to conduct an energy evaluation and blower door test on your home. Blower door tests enable you to clearly identify air leakage all around your home and are part of a regular EnerGuide Home Evaluation Service.
A third option is to hire a contractor with experience in air sealing to conduct a visual inspection of your home.
Benefits of Air-Sealing
- Consistent comfort: Reduces drafts and maintains more even temperatures throughout your home.
- Quiet comfort: Reduces unwanted sound from leaking into your home from the outside.
- Save money: Reducing heat loss in your home also reduces the energy consumed, which results in lower utility bills.
- Climate-friendly: Reduced heat loss means less energy needed to heat your home resulting in a smaller carbon footprint.
- Reduced maintenance costs and improved durability: Reduces moisture passing through your walls, reducing rot, mould, and mildew.
- Cleaner, more pest-resistant home: Eliminating air leakage sources reduced pathways for dust, allergens, insects and other pests to enter your home.
What To Prioritize When Air-sealing
While the type of home and house-specific issues may result in adjustments to the list below, generally the priority areas for air-sealing are:
1. In areas to be insulated, before insulating
2. Large holes, regardless of location
- Plumbing or electrical penetrations, ductwork through unconditioned spaces, large gaps under doors, masonry chimney chase ways.
3. Smaller holes on top floor ceiling/attic
- Pot lights, ceiling penetrations around fixtures, attic hatch, attic knee walls, service shafts, etc.
4. Smaller holes on the bottom floor
- Hose bib penetrations, cracks on exterior and foundation walls, basement doors, electrical boxes, gas lines or oil fill pipes that go through exterior walls, etc.
5. Smaller holes at main floors
- Windows, doors, top and bottom of baseboards, fireplace dampers, electrical outlets, switches.
Common Areas for Air Leakage

- Sill and header
- Windows
- Electrical outlets
- Foundation cracks
- Floor drain
- Service lines (gas pipes, etc)
- Mail slot
- Doors
- Ceiling penetrations
- Exhaust fan vents
- Around the attic hatch
- Chimney
- Fireplace including perimeter
Understanding Air-sealing Prioritization
- Why complete air-sealing in areas to be insulated, before insulating? Before any insulation is added to a wall or roof, air-sealing should be performed within the insulated area. Failure to do so may result in moisture entering the insulated area, reducing insulation effectiveness and resulting in health and durability issues. Air-sealing before insulating is always the highest priority.
- Why in large holes regardless of location? Large holes are a significant air leakage pathway. Large holes are easier, and more cost-effective, to fix than other leakage areas. Large holes present quick air-sealing wins.
- Why on the top floor? In most homes the most significant air leaks are frequently found in the attic/ top floor and basement/lowest floor. This is due to the stack effect: in a heated home, less dense warm air rises and expands, creating a higher-pressure area near the top of the house pushing warm moist air out through air leakage points. Air-sealing at the top of the home eliminates, or at least reduces, movement of moist warm air being pushed through your ceilings and roof, thereby minimizing the stack effect which also pulls cold air into the lower levels.
- Why on the bottom floor/basement? Air-sealing efforts on the bottom floor further reduce the ability of the stack effect to pull cold air into the lower portions of the home.
- Why is it not recommended to only complete air-sealing on the main floor? While air-sealing on the main floor can reduce air leakage and assist in improving comfort on windy days, if air-sealing is undertaken on the main floor without addressing air leakage issues on the top and bottom floors, the work on the main floor will not reduce air leakage caused by the stack effect. Instead, the main floor air leakage may result in a home that is a better funnel for air leakage from bottom to top, caused by the stack effect.

Getting Started
1. Make a Plan - DIY or Hire a Contractor (or Both)
- Use the findings from your air leakage investigation, or the results of your EnerGuide evaluation, to make a home air-sealing plan.
- If you are handy and you feel the air sealing tasks are doable get ready for a DIY air sealing job. Review the Additional Resources below for guidance.
- If the job is more challenging, beyond your skill level, or may involve hazards such as asbestos or climbing up ladders, contact a contractor to complete the work.
2. Use Safety Equipment & Be Aware of Hazards
- Safety Equipment: Long sleeves and pants, knee pads, hat, dust mask, googles, etc.
- Hazards: Be aware of low ceilings, and protruding nails and screws. Do not disturb asbestos products, which may be in insulation, drywall, or other materials in your home.
3. Prepare Tools & Materials
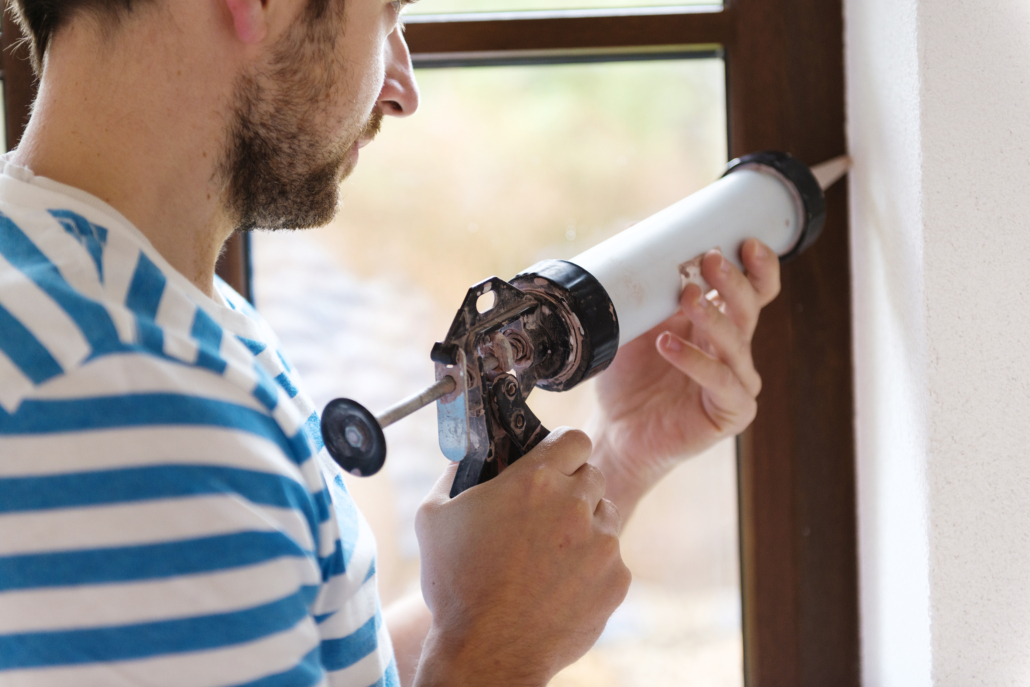
- Different air-sealing areas require different techniques, tools, and materials. Example supplies include: Caulking gun, various types caulking, construction knife, spray foam, weather stripping for windows and doors, sheet polyethylene, ridged insulation, and more.
- For smaller holes (less than 1cm wide): Polyurethane, Silicone or acrylic caulk and caulking gun.
- For medium holes (1cm – 7.5cm wide): Cans of expanding spray foam insulation or foam backer rods.
- For larger holes (more than 7.5cm wide): Use the appropriate ridged sheet materials – rigid insulation, plywood, drywall – and ensure an air tight seal is made with an appropriate caulking product.
Additional Resources
These resources provide detailed guidance on completing air-sealing in your home. Remember that sufficient ventilation is required for efficient and safe functioning of appliances and other household devices. If making your home very air tight, consider a heat recovery ventilator (HRV) for ventilation and added efficiency.
